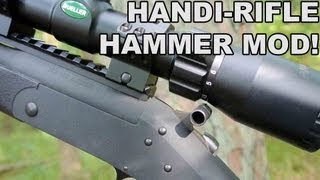
Handi-Rifle Hammer Mod! Getting Clearance for a Scope
Handi-Rifle Hammer Mod! Getting Clearance for a Scope
 This video is for educational purposes and discussion only. Do not attempt to imitate anything contained herein.
The best way to keep up to date is to join my mailing list: http://twangnbang.net/signup/
I am active throughout the day on Facebook: https://www.facebook.com/TWANGnBANGdotNET/
If you’d like to support the channel for free, please use the links below whenever you start your online shopping. This is huge and really helps:
AR500 Armor: https://goo.gl/BeiUaS (Save 5-10% with link and code “twangnbang”)
TacticalWalls: https://goo.gl/FuTBj4
AirGun Depot: https://goo.gl/HNRdzF
ShootSteel.com: https://goo.gl/mUNLzf (save 10% with link and code “TWANG10”)
Found out its easier to just buy a see thru scope mount for like $24
Milling machine is best to use for these mods and many other mods for firearms.
Thanks so much!
Great video. I’ve been thinking about adding one of these hammer extensions to my lever action rifle just for leverage but I was curious how they mounted. I was not sure if you had to drill and tap.
tried this using Leupold low PRWs, uncle mikes hammer extension, and a Nikon P-300 Blackout Rifle Scope 2-7x 32mm. The scope still does not make clearance due to the size, shape, and location of the power magnification dial. A few notes though, the unlocking lever is loose and tends to snag/rub the extension spur. (especially when gravity pulls it out, such as decocking with the muzzle skyward) i had to grind the edges of both the lever and the extension spur to ensure they would not ever contact. I used an angle grinder and it made short work of the hammer. I cut a 90 deg relief into the hammers base where it widens out to help seat the ext. lower rather than open up the inside of the extension, this ensured a tight snug fitment when installed.
It is a camera accessory thumb screw. You can buy these at camera shops or online.
That would make for an awful cheek weld. Lower rings are better, and it was easy to do.
Thanks!
Did you ever solve the vertical stringing on the Handi 300 BO?
nice Project! A sharp clean flat file would do it quicker I think, and of course no worries about overheating. I hate seeing guys using dremels on guns. But it works!
What did you add under the forend stock screw?
There are so many little garage gunsmith projects like this that anyone can do. This just happened to be one I could get on video.
I have a Handi in S&W 500 Mag. I don’t have any stringing problems. Only problem I have is recoil.
Thanks so much!
How did you attach the hammer extension? Never mind I see it has a set screw. Thanks Nice Video.
How do you guys that own these handi rifle deal with light primer strikes?
AAC really thought this one through.
I was getting soft primer strikes with that offset hammer extension. As much as I liked it, it was making for unreliable shots. When I took it off it was making good strikes again. Wish I could get it to work. :/
Has the trigger become lighter with use? That is the only thing negative about this rifle. I am use to 4.5 triggers.
Thanks for watching!
Hey man I like your vid. Your rifle looks sweet as well with that scope and muzzle break. IMO I think a skeletonized buttstock would complement the muzzle break and scope, that’s just my two cents anyways, well done.
Your methods for modification are awesome to say the least. I can really appreciate how you went about cutting and shaping that hammer. This is a project that I am about to start soon and you basically showed me every step that I need. Thanks for the great vid…
This is a damn-good video!
Did you fix your vertical stringing issue?
I just pickup up a combo deal for this rifle in 30.06 and 20 gauge. The guy had already modded the hammer. 🙂
Glad you liked the video. I thought most would find it boring, but I don’t do much of anything without videoing it these days. 🙂
this is a perfect hog rifle. I have a HiLux on mine and its great out to 300 meters so far. I don’t see hunting out past 200m…
I just got taller rings. It works fine.
who would go to all that trouble,when all you have to do is install higher rings.
Thank you going to use this method on my Henry Single shot
My AAC 762-SDN-6 is actually featured in the video where I review this rifle. Very nice combination. You can find the link in the video description.
Would it have cleared with mid rings? Just curious,trying to avoid grinding hammer for now
Medium or high rings will fix clearance issues as well.
Just let us know when you tried it out again! I’m thinking about getting one too, but I’m only allowed 2 Guns per Half Year by law. If the Gun’s Sh!t, I lost one Slot and am practically stuck with it 🙁
I think so, but I have been too busy working on a video tribute to my grandfather to get to the range to confirm.
Always interesting and fun to watch your videos TwangNBang! Great work on the rifle!
GET HIGHER SCOPE RINGS
Yeah, that’s the problem with light rifles. This actually uses the youth stock, so for a 300 BLK, it has a little recoil.
It’s the Rockwell Jawhorse. I love it.
what thumb screw are you using for your forend?
They are great rifles!
I tried it again, and frankly, I’m not too excited about it. I’d get an AAC Micro 7 instead.
Gunsmithing, love it!
Thanks!
Me and my dad have one just like that in 270 with the hammer mod best deer rifle out there.
I’m sure you know this, but the bluing pen doesn’t work for all metals. There are different types of bluing for brass and aluminum as well. I’ve ran into the same issue with that pen as my vise had scratched an upper I was working on. For new guys out there, painting is ok, but remember if it gets hot; think about what your putting on it and make sure it’s made for that application.
that is great
I have the Mueller APT also. It is on my Remington R25 and I love it. I would like to put one on my Savage 30 06 I just don’t know if it would hold up. Anyone know if it will hold up on a 30 06?
You need a suppressor for that rifle now. A thermal imaging scope would be nice too. Nice work on the hammer modification.
It’s really easy. Just make sure you keep the hammer from getting hot.
Cool! Great job!